

Printable Photo Paper in A4 and A3
Premium inkjet photo paper in gloss, matte, satin lustre and textured finishes. Includes resin-coated (RC) and heat-resistant options, designed for vibrant colour, sharp detail and professional-grade results for photo prints, magnetic bookmarks, backing cards, fine-art reproduction and wedding stationery.
✨ Which photo paper is right for your project?

RC Photo Paper
Resin-coated paper with a sealed layer that keeps ink near the surface. Sharper images, faster drying, deeper colour. Best for photo prints, fine-art reproduction and gallery-quality work.

Heat-Resistant Photo Paper
Manufactured for thermal lamination. Our studio uses this exact paper for magnetic bookmarks, flat bookmarks and backing cards. Print, wait 24 hours, laminate for rigid professional results.

Double-Sided Photo Paper
Printable coating on both faces. Gloss 180gsm and Matte 250gsm available. Designed for greeting cards, wedding stationery, postcards, flyers and any print that needs front and back artwork.
-
Gloss Photo Paper (180gsm) - Double Sided - A4/A3
Proveedor:STICKIPLYPrecio habitual A partir de £3.95Precio habitual£3.95Precio de oferta A partir de £3.95 -
Gloss Photo Paper (180gsm) - Single Sided - A4
Proveedor:STICKIPLYPrecio habitual A partir de £3.95Precio habitual£3.95Precio de oferta A partir de £3.95 -
RC Gloss Photo Paper (310gsm) – Single Sided - A4
Proveedor:STICKIPLYPrecio habitual A partir de £4.75Precio habitual£3.95Precio de oferta A partir de £4.75 -
RC Satin Lustre Photo Paper (265gsm) – Single Sided - A4
Proveedor:STICKIPLYPrecio habitual A partir de £3.95Precio habitual£3.95Precio de oferta A partir de £3.95 -
Matte Photo Paper (250gsm) - Double Sided - A4
Proveedor:STICKIPLYPrecio habitual A partir de £3.95Precio habitual£3.95Precio de oferta A partir de £3.95 -
RC Archival Photo Paper (265gsm) – Single Sided - A4
Proveedor:STICKIPLYPrecio habitual A partir de £3.95Precio habitual£3.95Precio de oferta A partir de £3.95 -
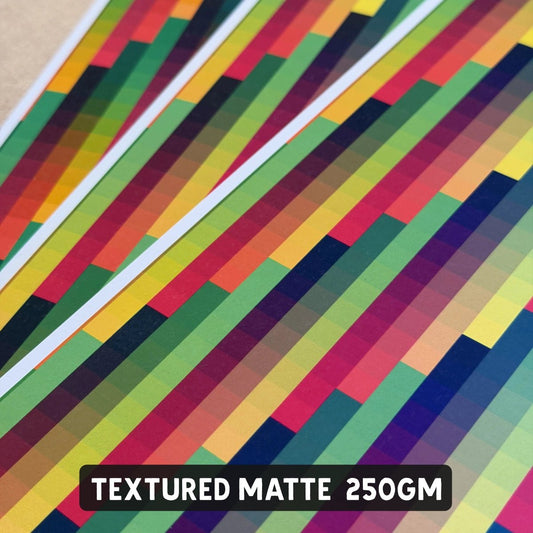
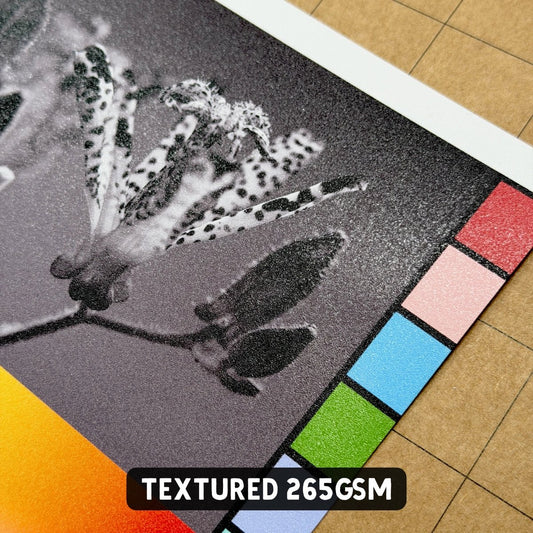
RC Textured Photo Paper (265gsm) – Single Sided - A4
Proveedor:STICKIPLYPrecio habitual A partir de £3.95Precio habitual£3.95Precio de oferta A partir de £3.95


Frequently Asked Questions
Making magnetic bookmarks at home? Real answers from our print floor. No vague craft-blog fluff.
🔖 Which photo paper should I use for magnetic bookmarks?
Two papers, both of which we use in our own studio every day:
Gloss 180gsm Double Sided: our standard for magnetic bookmarks. Prints both sides, feels premium, thermal laminates cleanly.
RC Gloss 310gsm: thicker and more rigid for a more substantial bookmark. Works with thermal lamination and with self-adhesive laminate, so it's our pick if you don't own a thermal laminator.
Both papers are specifically manufactured to handle the heat of a thermal laminator without warping, blistering or peeling.
📏 Should I choose 180gsm or 310gsm?
180gsm is our go-to for most bookmarks. Lighter, more flexible, easier to cut and trim, and it gives a classic bookmark feel after lamination.
310gsm is thicker and noticeably more rigid. Use it when you want a premium-feeling bookmark, a chunky product for market stalls, or when you're using self-adhesive laminate instead of thermal.
Both look equally professional. It's a weight and feel decision, not a quality one.
🔥 Why do I need heat-resistant photo paper?
Thermal laminators use heat and pressure to seal the laminate pouch around your print. Regular photo paper coatings aren't designed for that much heat.
Run the wrong paper through a thermal laminator and you'll get warped sheets, blistered coatings, peeling, or ink that's melted into the laminate.
Our 180gsm Gloss DS and 310gsm RC Gloss are both manufactured for thermal lamination. Use these two for any bookmark project.
❌ Can I make bookmarks with your other RC papers?
Not if you're thermal laminating. Our Satin Lustre, Archival, Textured and Matte DS papers are premium print papers, not heat-resistant.
These papers are beautiful for photo prints, fine-art prints and greeting cards. For bookmarks specifically, stick with 180gsm Gloss DS or 310gsm RC Gloss.
📑 Do I need to print both sides of the bookmark?
If you want front and back artwork, yes. Print side one, let it dry, flip and print side two.
This is why we recommend our Gloss 180gsm Double Sided paper for bookmarks. Both faces have the same printable coating.
If you're only printing one side (for example a bookmark with a magnetic backing and a blank reverse), the Single Sided version works too.
⏱️ Why wait 24 hours before laminating?
This is the single most important step, and the one most people skip.
The print will feel dry within minutes, but the ink is still absorbing into the paper coating underneath for up to 24 hours. If you laminate too early, trapped moisture causes bubbling, cloudy patches, adhesion failure or ink that smudges under the laminate.
Wait the full 24 hours. It's the difference between bookmarks that look professional and bookmarks that look ruined.
🛡️ Which laminate should I use for magnetic bookmarks?
Our house workflow uses thermal pouches:
Gloss Laminating Pouches: high contrast, shiny finish, most vibrant colours.
Matte Laminating Pouches: soft finish, no glare, premium feel.
If you don't own a thermal laminator, use RC Gloss 310gsm paper combined with our self-adhesive laminates. Same finished result, no machine needed.
📐 What laminate thickness works best?
150 micron thermal pouches are our studio standard for bookmarks. Rigid enough to feel premium, thin enough to trim cleanly with scissors or a guillotine.
Thinner (80-125 micron) is easier to cut but feels flimsier in the hand.
Thicker (175-250 micron) is sturdier but harder to trim neatly and more likely to show rough edges after cutting.
Stick with 150 micron unless you have a specific reason not to.
🧲 What magnets do I need?
For magnetic bookmarks you need two magnets per bookmark (one for each end of the bookmark so it clips around the page).
We stock everything you need in our magnets collection. Small round self-adhesive magnets are the easiest to work with. Magnetic sheet is an alternative if you prefer to cut your own shapes.
Make sure the magnets are strong enough to hold through the thickness of laminate plus paper. Our small round magnets are sized for exactly this.
👆 How do I attach the magnets?
Fold your laminated, trimmed bookmark in half. Decide which end will sit over the page and which will sit under.
Peel one self-adhesive magnet and press it firmly into place on the inside of the fold. Peel the matching magnet and press it into position on the opposite inside face so the two magnets meet when folded.
Check polarity before sticking. If the magnets repel instead of attract, flip one.
Press firmly for 10-15 seconds to activate the adhesive bond.
✂️ How do I cut my bookmarks out?
Laminate the full sheet first, then cut. Cutting before laminating leaves exposed paper edges that wick moisture and peel over time.
Scissors: fine for small runs. Slow but free.
Guillotine: much faster for straight-edged bookmarks. Our go-to for market prep.
Cutting machine (Cricut, Silhouette, Siser): best for rounded corners, shaped bookmarks or anything intricate. Laminated photo paper is thicker than vinyl, so you'll need more force and usually 2-3 passes.
🖨️ What printer settings should I use?
Highest quality setting, every time. Bookmarks are held close to the eye, so print detail matters.
For paper type, set it to "Premium Glossy Photo Paper" or "Photo Quality Inkjet" for both our 180gsm DS Gloss and 310gsm RC Gloss.
If you're unsure, print a small test bookmark with two or three paper-type settings on one sheet and compare them side by side.
🚫 Can I use a laser printer?
No. All our photo papers are for inkjet printers only.
Laser printers use heat to fuse toner onto paper. Photo paper coatings aren't heat-stable at laser temperatures, and running them through a laser can melt the coating, warp the sheet, or damage your printer's fuser.
If you only have a laser printer, look at laser-compatible alternatives. For bookmarks specifically, inkjet is the standard.
📦 How should I store photo paper?
Flat, cool and dry. Every Stickiply pack ships with greyboard inside so unused sheets stay flat between runs.
Photo paper is more humidity-sensitive than vinyl. Damp sheets cause ink bleeding, colour shifts and feed problems during printing.
Avoid radiators, bathrooms, direct sunlight and unheated spaces. If you buy in bulk, transfer the unused sheets into a resealable document folder between prints.
💼 Can I sell the bookmarks I make?
Yes. Our papers, laminates and magnets are all sold for commercial use. Markets, Etsy, craft fairs, online shops, wholesale are all allowed.
The only restriction is on your artwork: you can't print and sell copyrighted imagery, book covers, characters or licensed designs you don't own rights to. The materials themselves have no restrictions.
A lot of small businesses building bookmark brands use exactly these papers. You're in good company.